Orders
The Orders feature enables engineers to plan and order parts, seamlessly integrating with Boltline's inventory planning and the organization's ERP system. It supports two types of orders: Purchase Orders and Retail Orders.
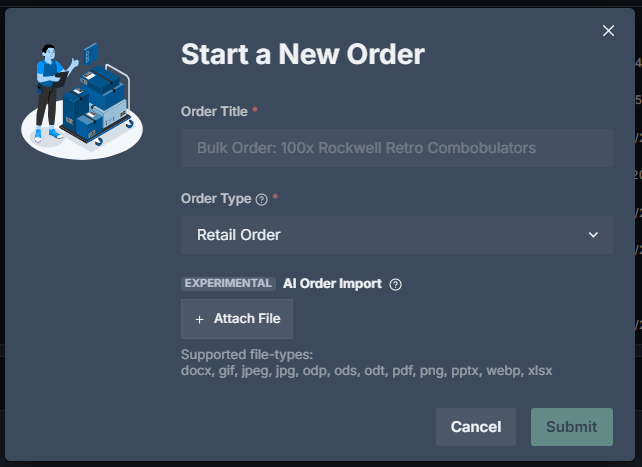
Create a New Order
-
Navigate to Orders in the Boltline navigation bar.
-
Click
New Orderin the top right corner of the window. -
The Start a New Order dialog box is displayed.
-
Type in a descriptive title for the order.
-
Select Retail Order or Purchase Order.
-
Attach any files (schematics, CAD drawings, etc.).
-
Click
Submit.
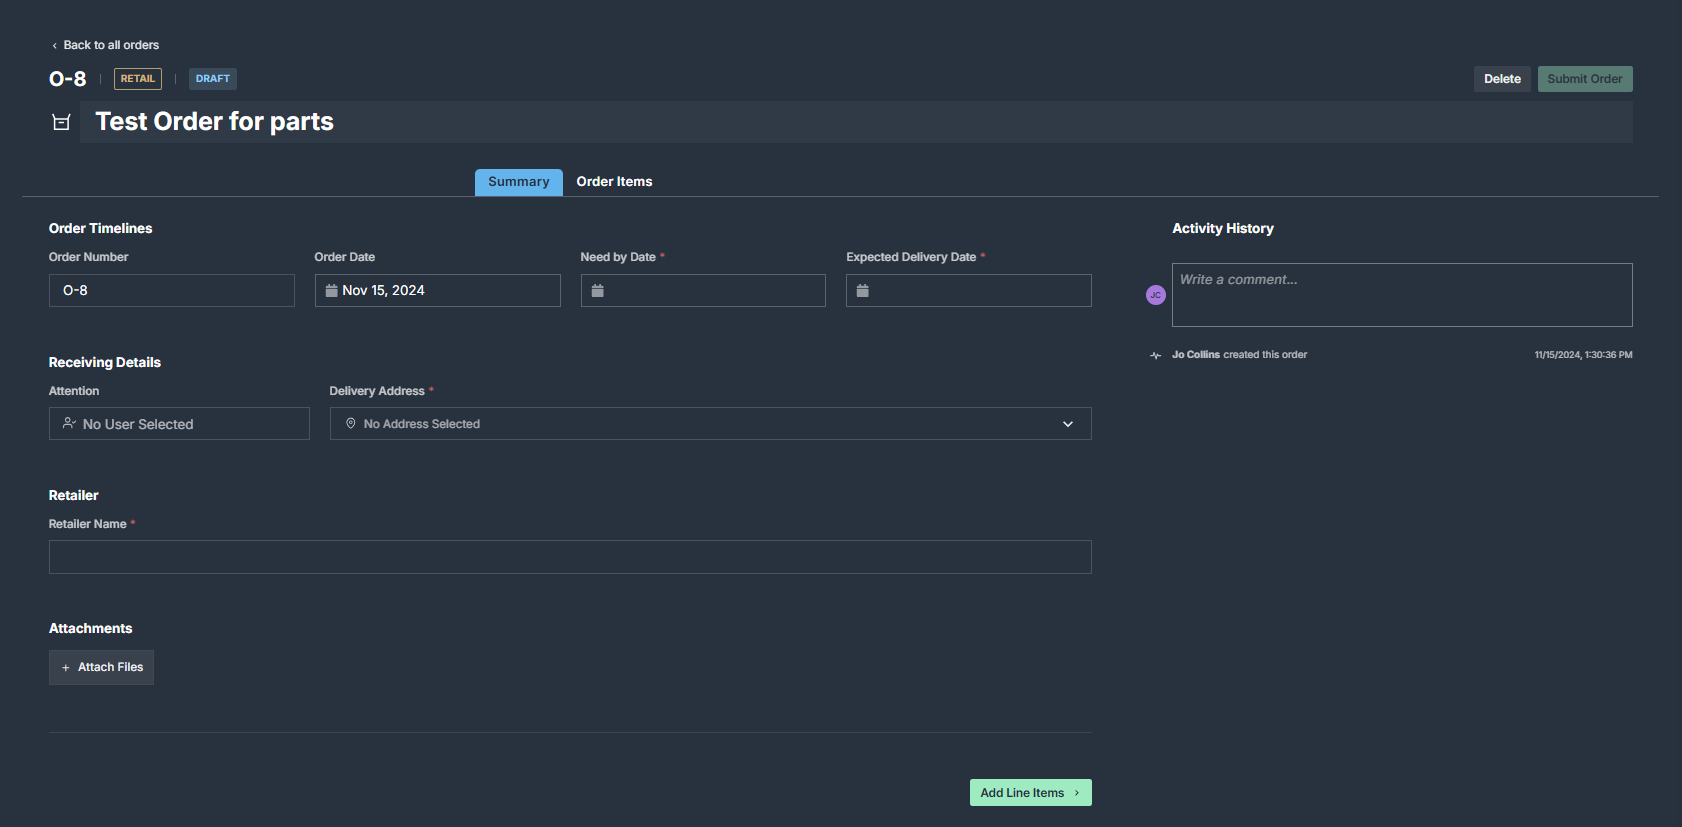
A new window opens for you to enter more details:
-
Complete the fields in the Summary tab.
-
Click
Add Line Itemsto enter the items you are ordering. -
Once everything is complete, click
Submit.
The inventory will now be visible in Boltline, marked as Planned.
Create a New Order with Alpha AI-Assisted Ordering
Boltline is testing an experimental AI-assisted order import. You can upload a document or screenshot with line items and Boltline will automagically enter your order details, create parts, and plan inventory for this order.
- Uploaded documents or screenshots are processed by AI to extract relevant order information.
- We recommend not uploading sensitive, confidential, or proprietary information during the testing phase.
- By using this feature, you acknowledge and accept the potential risks associated with testing an AI-powered tool and understand that the results may not be fully accurate or reliable at this stage.
Please review the generated order details thoroughly and report any issues or discrepancies to help improve the system.
Cancel an Order
Canceling an order marks it as Canceled in Boltline. This action is permanent and cannot be undone. You can cancel Purchase Orders and Retail Orders.
Once an order is canceled, it cannot be restored. Be sure to notify the vendor and, if applicable, your billing and accounting departments after cancellation.
When Can an Order Be Canceled?
An order can only be canceled when all of the following are true:
- The order has been submitted (draft orders must be submitted first).
- No inventory from the order has been received.
- The order is not already completed, archived, or canceled.
If cancellation is not available, the Cancel Order option will appear grayed out with a tooltip explaining why.
How to Cancel
- Open the order you want to cancel.
- Click the three-dot menu (⋮) in the top-right corner of the order page.
- Select
Cancel Order. - The Cancel Order confirmation dialog appears, showing the order number and title.
- Review the cancellation options (see below).
- Click
Cancel Orderto confirm, or clickBackto return to the order without canceling.
After confirmation, the order status changes to Canceled and a success message is displayed.
Cancellation Options
Depending on your order, you may see additional options in the dialog:
-
Delete planned inventory — If the order has unreceived inventory items planned against it, you can choose to delete them. The count of affected items is shown in the dialog, with a link to view them in the Inventory Library. This option is checked by default. Uncheck it if you want to keep the planned inventory.
-
Update ERP status (Xero / Acumatica) — When the order is synced and your organization uses Xero or Acumatica, you can update the external purchase order status (for example, Deleted in Xero). This option is checked by default.